Computing
Using the GTOPO30 Global Topographic data set with ArcGIS on the PWF
Introduction
This document describes how to obtain a subset of the GTOPO30 global Digital Elevation Model (DEM). You can always obtain the latest version of this document from: http://www.arch.cam.ac.uk/comp/ac047/
The GTOPO30 data set provides a digital elevation model of the entire world at a resolution of approximately 1km. It is therefore handy for creating maps of large parts of the world. This document describes how to obtain and unpack the data, read it into to ArcGIS, select an area of interest, and finally whack it into ArcMap in order to produce a pretty picture.
There are three parts to the tutorial:
- Obtaining and Unpacking the Data
- Importing, Joining and Cropping Data Tiles
- Opening the Data in ArcMap
The GTOPO30 data set is described in some detail in the README file. There is further information in the FAQ.
You can see an example of a small map made using this data in a PDF file here.
In this example we will make a map showing most of Italy, plus Sicily, Sardinia, and Corsica, i.e. a subset of the GTOPO30 data set.
Like all good things the GTOPO30 data set is divided into tiles, and by unhappy coincidence the area described above spans two tiles, so we need to do the following:
- Download the necessary tiles
- Get the tiles into a format readable by ArcGIS
- Set the projection of each tile correctly
- Join the two tiles
- Extract a subset of the two tiles that corresponds with our area of interest
The size of each tile varies, but none of them are small, so we will do all the preliminary work in C:TEMP, which is scratch space available on the PWF. If you leave data in C:TEMP, logout, and then come back there is no guarantee that it will be there when you return, so having done the work listed above we will then move the finished result to our PWF Home Directory (F:). This procedure obviates the need for enormous disc quotas, and prevents you wasting disc space by accumulating great quantities of superfluous data.
Hey ho, let’s go. To create our map we will require the W020N90 and W020N40 tiles. Let’s begin by grabbing the W020N90 tile which covers most of western Europe and the north Mediterranean.
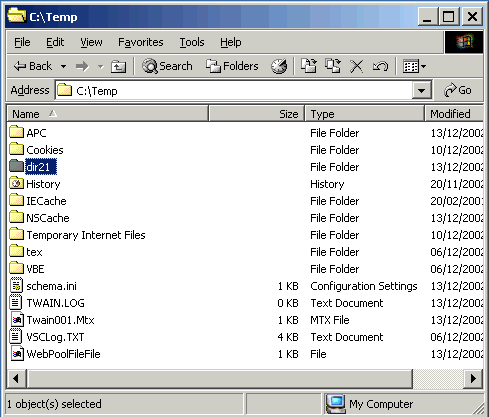
Begin by creating a directory in C:TEMP to hold your temporary working files, e.g. I created C:TEMPdir21 to store my stuff.
Obtain the data from http://edcdaac.usgs.gov/gtopo30/gtopo30.html (NB: I’m assuming that you are using Netscape Communicator here).
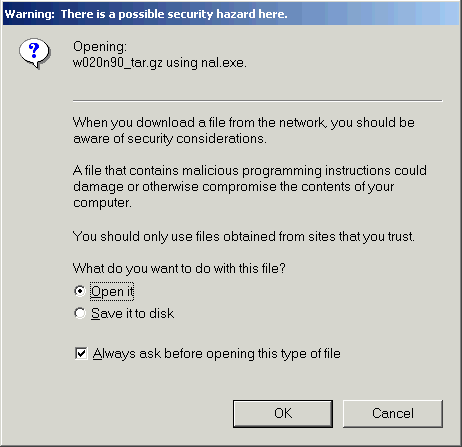
Each tile is provided as a tar’d and gzip’d archive. When you click to download in Netscape Communicator you are offered the choice of opening or saving the archive, as shown below:
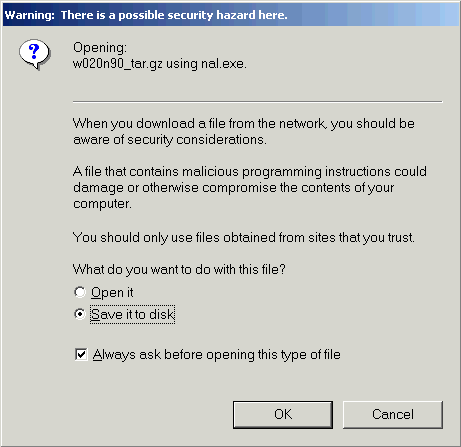
Don’t open the archive—save it to your temporary directory (e.g. C:TEMPdir21). Tell Communicator that you want to Save it to disk and click OK:
When Communicator shows you the Save As dialogue it offers to save the file as w020n90_tar.gz:
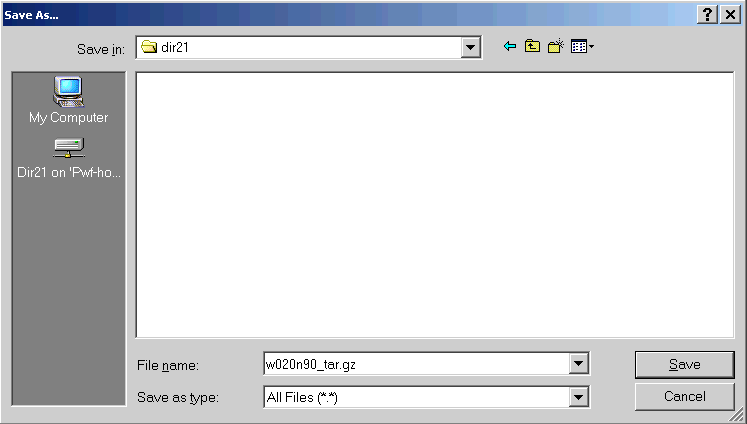
This is wrong. Correct the file name so that the underscore is replaced by a full stop, like so:
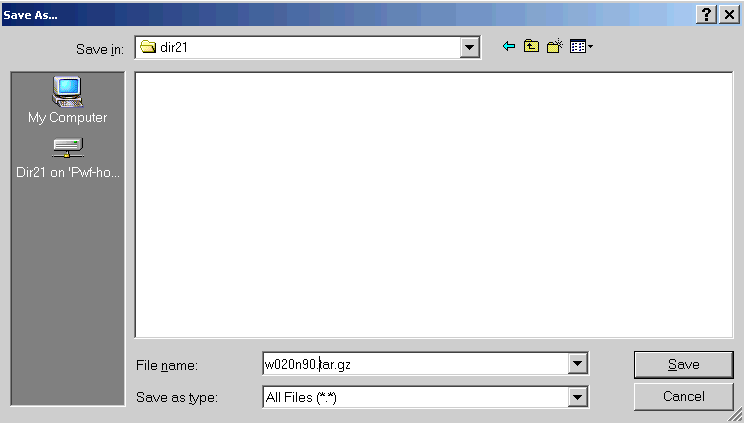
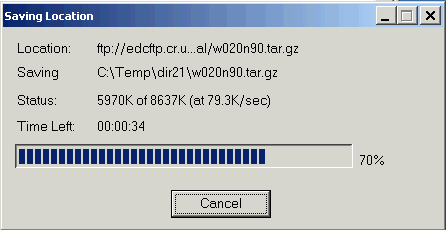
Then click Save and wait for the archive to download:
The archive can be unpacked by WinZIP, but before you can do so, you need to modify the configuration of WinZIP. Do not therefore go and try to double-click the downloaded archive because you will end up with corrupt data.
Start WinZIP by clicking on the Start button in the bottom left hand corner of the screen:

Choose PWF Programs and Information:

Choose Utilities and Accessories:

Choose WinZIP 8:

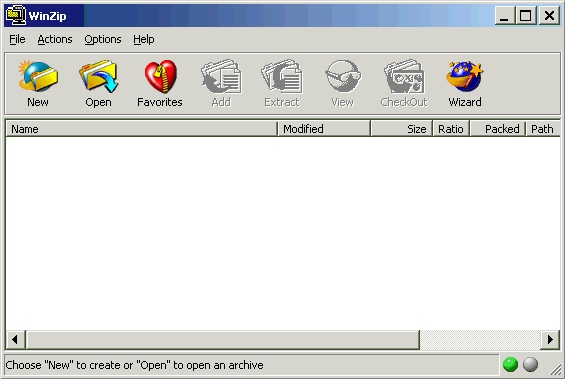
WinZIP will appear:
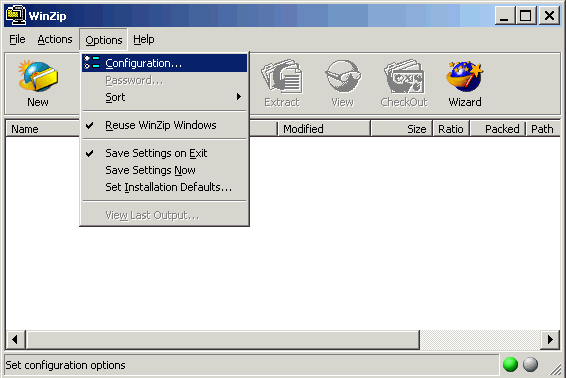
Go to the Options menu and choose Configuration:
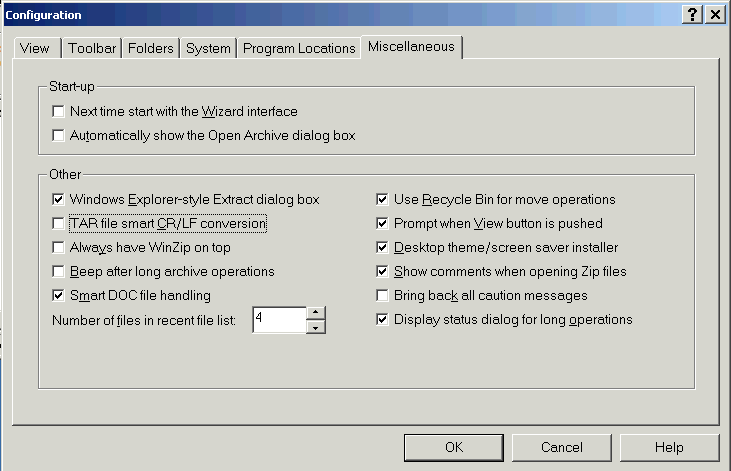
The Configuration dialogue box will appear. Select the Miscellaneous tab:
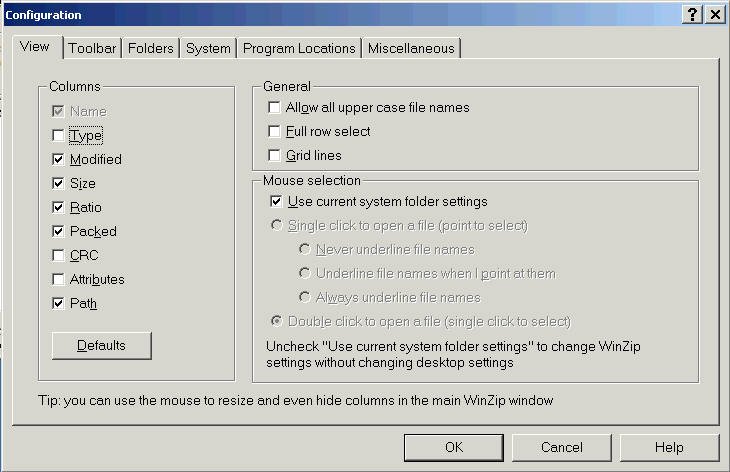
Ensure that there is NOT a tick in the box labelled TAR file smart CR/LF conversion and then click OK:
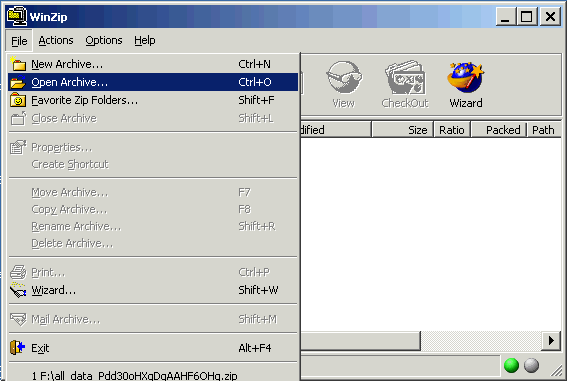
Go to the WinZIP File menu and choose Open Archive:
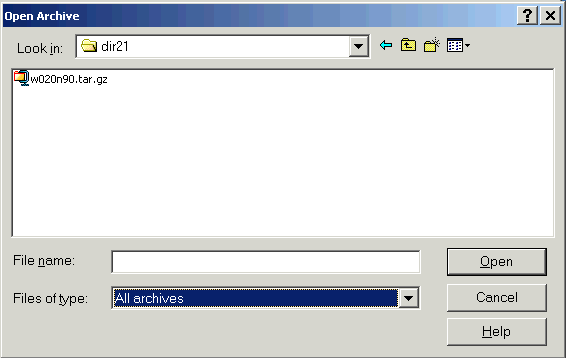
In the Open Archive dialogue box you will need to set the Files of Type picklist to All archives. Navigate to your temporary directory and choose the archive you have downloaded:
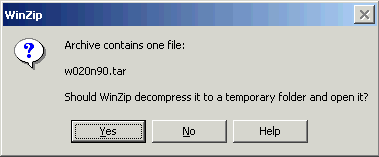
You will be prompted as shown below: Answer Yes.
WinZIP will display the contents of the archive:
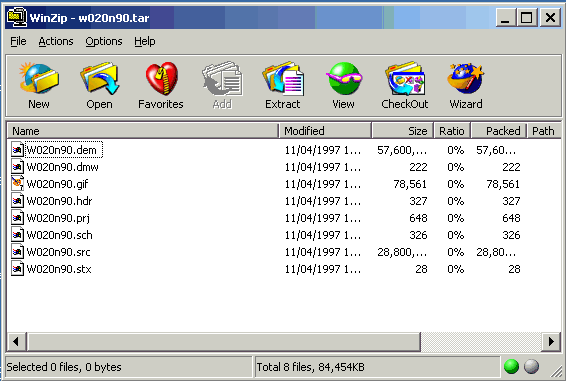
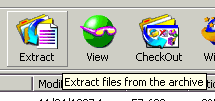
Click on the Extract button:
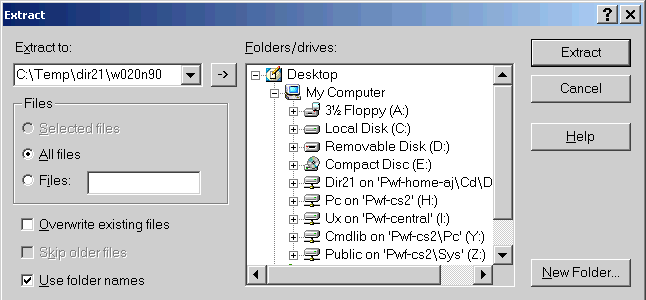
Tell WinZIP to extract the data to your temporary directory. Ensure that you have chosen All Files, then click Extract:
You should end up with your temporary directory containing the files as shown below:
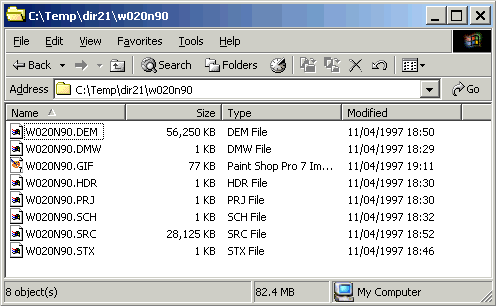
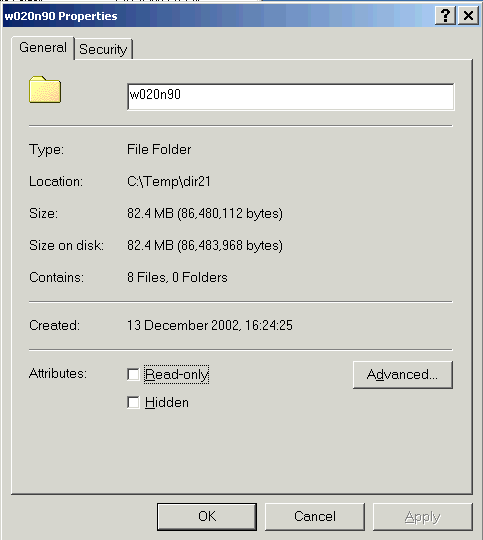
You can see that this tile plus metadata is 82.4 MB in total, which is probably a bit more than you want to keep hanging around in your Home Directory doing nothing:
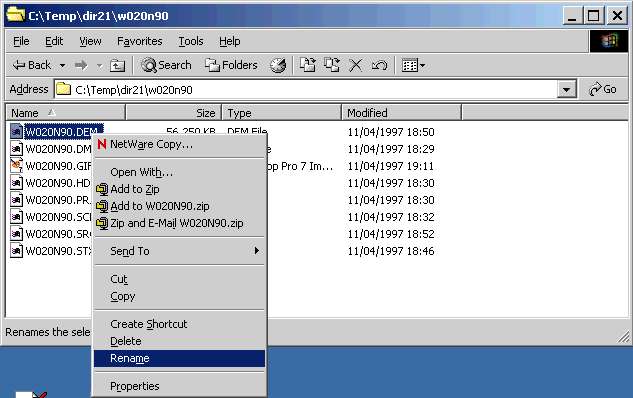
The .DEM file is the one that actually contains the data—it needs to be renamed to be a .BIL file before we can use it. Right-click on the .DEM file and choose Rename from the context menu that appears:
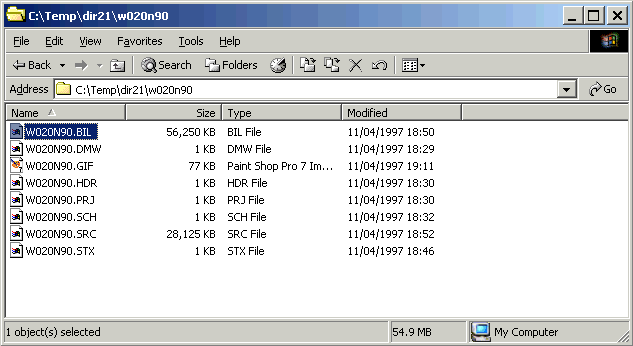
You should end up with a set of files looking like this, e.g. in this case, W020N90.DEM has become W020N90.BIL:
Having downloaded and correctly unpacked the data we now need to process it. Click here to proceed to the next stage.
Using the GTOPO30 Global Topographic data set with ArcGIS on the PWF: Part II
- Obtaining and Unpacking the Data
- Importing, Joining and Cropping Data Tiles
- Opening the Data in ArcMap
We are going to use ArcGIS Workstation to process the downloaded GTOPO30 DEM.
Click on the Start button in the bottom left hand corner of the screen:

Choose PWF Programs and Information:

Choose Database Packages:

Choose ArcGIS:

Choose Workstation:

Choose Arc:

A command prompt running the Arc shell will appear. When it has printed the startup message it offers an Arc prompt, i.e. you can type commands after the bit that says Arc:.
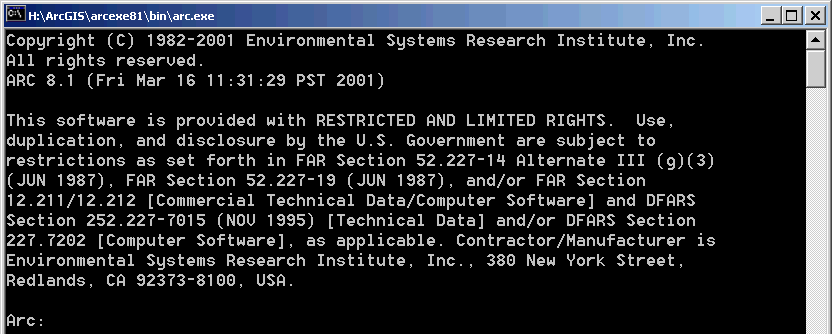
We need to tell Arc where we have put the data we are working with, so issue the command workspace followed by the path to the unpacked archive. For example, I unpacked the archive in to a temporary directory C:TEMPdir21w020n90 so I say:
workspace c:\temp\dir21\w020n90

Next, we want to convert the elevation data set into something readable by ArcGIS. To do this, we use the imagegrid command. The imagegrid command takes two arguments—the name of the file to be imported, and the name of the ArcGIS grid to be created. In this case, the file to be imported is W020N90.BIL, and I may as well call the resulting grid w020n90, so I say:

However, the GTOPO30 data set uses the value -9999 to indicate NODATA and the imagegrid command handles this imperfectly, so we need to do a bit of tidying up. We’ll do this in the ArcGIS Workstation GRID module, which is started by saying grid at the Arc prompt:

The GTOPO30 README file tells us this:
IMAGEGRID does not support conversion of signed image data, therefore the negative 16-bit DEM values will not be interpreted correctly. After running IMAGEGRID, an easy fix can be accomplished using the following formula in Grid:
out_grid = con(in_grid >= 32768, in_grid - 65536, in_grid)
The converted grid will then have the negative values properly represented
Which means (ish),:
- out_grid is the name of a new grid that will be created as the result of this operation—you can choose this name yourself (I’ve chosen to just append _1 to the existing grid name)
- in_grid is the name of the existing grid that we want to tidy up
- con is the CONDITIONAL operator—you can read more about this using ArcDoc
So, this formula says: create a new grid called out_grid based on an existing grid in_grid. If a cell in in_grid has a value greater than or equal to 32768, subtract 65536 from that value and put the result in the new grid out_grid, otherwise just copy the value in the existing grid in_grid to the new grid out_grid.
Clear?
This gives us a grid with elevation values where the GTOPO30 model has elevation values, and -9999 where the GTOPO30 model doesn’t (i.e. the oceans), and in the case of this example is written as:
w020n90_1 = con(w020n90 >= 32768, w020n90 - 65536, w020n90)

Now we have a grid w020n90_1, in a format acceptable to ArcGIS, with the same characteristics as the original GTOPO30 database. But we don’t really want a map containing lots of -9999 values—it’ll play merry hell with our map legends if nothing else. So we want to convert all the -9999 values to NODATA, which ArcGIS actually recognises as meaning `I have no information about this location’.
Before we can do this we need to tell GRID about the characteristics of the grid we want to create. The characteristics are going to be the same as the grid we are already working with, so we can tell GRID to copy those characteristics from that grid, by saying:
setcell w020n90_1
setwindow w020n90_1

You can find out more about setcell and setwindow by using ArcDoc.
We can now convert all those -9999s to NODATA by using the GRID operator setnull to create a new grid which in this case I’ll call w020n90_2:
w020n90_2 = setnull(w020n90_1 == -9999, w020n90_1)

Quit GRID by saying quit at the GRID prompt and hitting return. This will retun you to the Arc prompt.
The last thing we need to do is specify the projection of the data set. We can cheat here. In the directory containing the unpacked archive you will find a file with a .PRJ extension—in this example W020N90.PRJ. Assuming you have specified a workspace as directed above, you will also see that some new directories have appeared, bearing the same names as the additional grids you have just created:
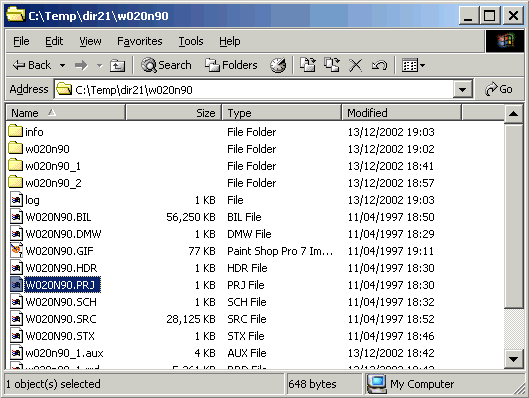
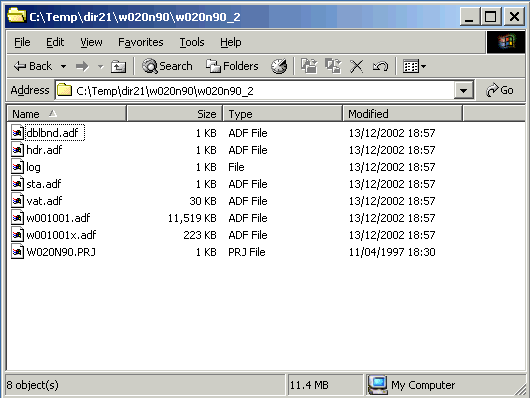
Copy the .PRJ file into the directory named after the last grid you created, in this example w020n90_2, and then open that directory:
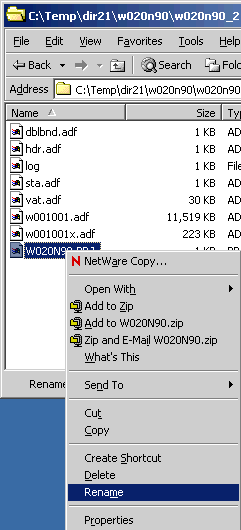
Right-click on the copy of the .PRJ file and choose Rename from the context menu that appears:
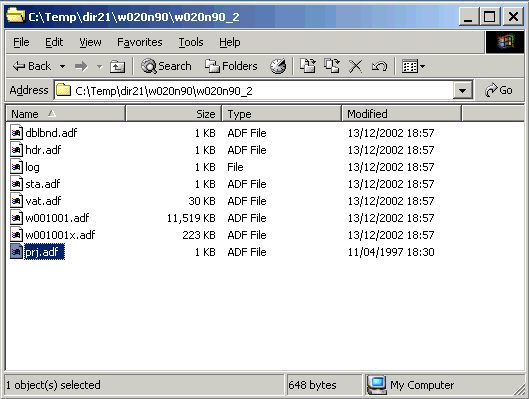
Rename the .PRJ file to prj.adf
Switch back to the Arc prompt and issue the command describe followed by the name of the last grid you created, in this example, w020n90_2:
describe w020n90_2
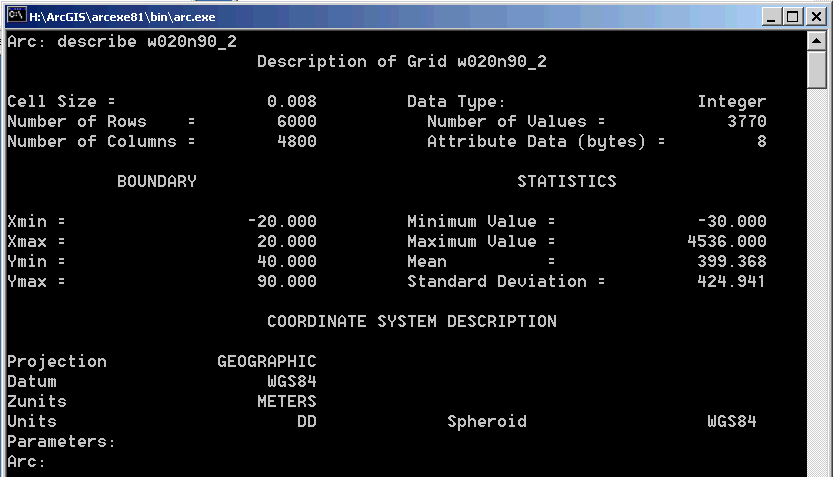
We now have a perfectly formed tile of GTOPO30 data in a temporary directory.
In order to add a second tile, you need to repeat the above process. In this example, my second tile is W020N40. Return to the GTOPO30 website, download the W020N40 tile w020n40.tar.gz and extract it into the same directory as you extracted the first tile. Perform all the above steps for the second tile, i.e. read it in using imagegrid, tidy it up, convert the -9999s to NODATA, and set up the projection.
At the Arc prompt, issue the command:
dir grid
which will list all the grids in your temporary workspace:

You should be able to see:
- the two grids that you originally read in from the .BIL files, w020n90 and w020n40
- the two grids you created when tidying up, w020n90_1 and w020n40_1
- the two final grids with correct NODATA and projections, w020n90_2 and w020n40_2
We will now use the latticemerge command to join the two finished grids. The latticemerge command takes a single argument, the name of the new grid you want to create. I will call this grid w020n40_90:
latticemerge w020n40_90

When you hit return, latticemerge prompts you for the names of the grids you want to join, thus:

After each grid name hit return. When you have entered all the grids you want to join, say END and press return, thus:

There will be some clicking and whirring, and latticemerge will do the business:

Use the describe command to examine the results:
describe w020n40_90
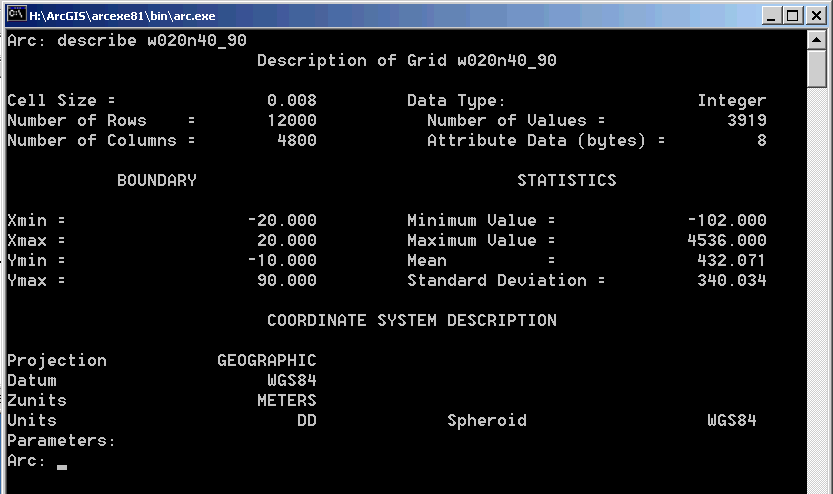
Beezer.
However, recall that we only want a subset of this data set. You need to determine the minimum and maximum x and y co-ordinates of this subset. You may already know these because you have specified them as part of your research elsewhere. Or you could look in an atlas and work out the extents of your area of interest from there. Or you could do what I did, which is open the grid in ArcMap, wiggle the cursor around and watch the co-ordinates displayed in the bottom right hand corner of the screen. Whatever.
For the purposes of this demonstration we will assume that I have an unwholesome fascination with the area between 7 and 19 degrees East, and 35 and 45 degrees North. In other words:
- minimum x = 7
- maximum x = 19
- minimum y = 35
- maximum y = 45
You will recall that earlier in the exercise we used the commands setcell and setwindow to specify some parameters for the creation of a new grid. We will do this again, only more so.
Start GRID by saying grid at the Arc prompt.
We want the subset of data to have the same resolution (approximately 1km per pixel) as the original GTOPO30 data set, so once again we tell GRID to copy that parameter from an existing data set:
setcell w020n40_90
However, we don’t want all of w020n40_90, just a subset, so this time we specify the extents of the window ourselves using setwindow like this:
setwindow xmin ymin xmax ymax
Which in the case of this example means we say:
setwindow 7 35 19 45
Finally, having set these parameters, we tell GRID to make a copy of w020n90_40 and call it mymap:
mymap = w020n40_90

You can use the describe command to confirm that the new grid mymap is a subset of w020n40_90.
Our final problem is that all this work has been done in a temporary directory which is likely to get deleted as shortly after we log out. So the last step is to dump our grid as an ASCII grid, move it into our Home Directory, and re-instate it.
Use the gridascii command to spit out a portable copy of the mymap grid:
gridascii mymap mymap.asc

Look in the directory in which you have been doing all this work. You will see two new files, mymap.asc and mymap.prj. These represent the portable grid.
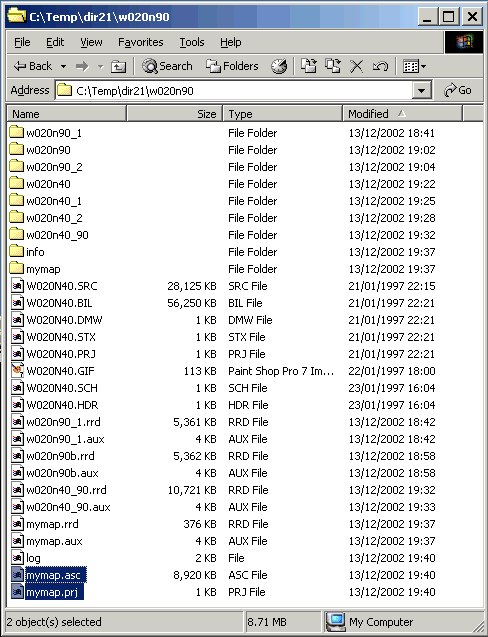
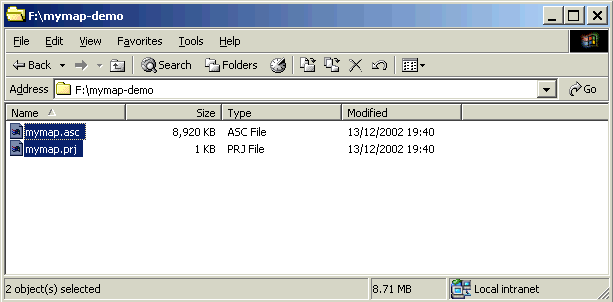
Create a new directory in your Home Directory (drive F:). For the purposes of this example I have created F:mymap-demo. Copy mymap.asc and mymap.prj to F:mymap-demo:
Switch back to the Arc prompt and change workspace by issuing the command:
workspace f:\mymap-demo

At the Arc prompt use the asciigrid command to read in the portable grid:
asciigrid mymap.asc mymap
This will convert the portable grid back into ArcGIS GRID format.
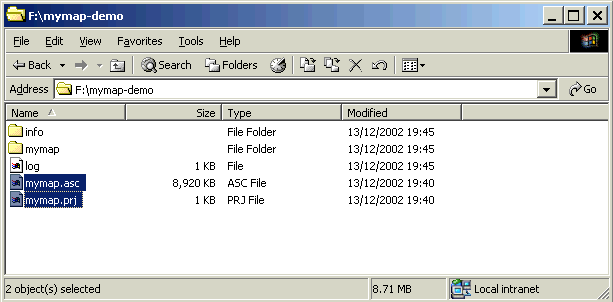
Look at the directory F:mymap-demo. You will see that additional files and directories have appeared. You can now delete mymap.asc and mymap.prj:
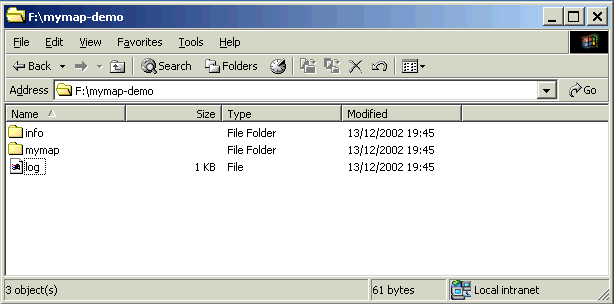
Switch back to the Arc prompt and issue the command quit to end your session.

Switch back to C:TEMP and delete your temporary directory:
The final part of this tutorial shows you how to open the grid in ArcMap.
Click on the Start button in the bottom left hand corner of the screen:

Choose PWF Programs and Information:

Choose Database Packages:

Choose ArcGIS:

Choose ArcMap:

The ArcMap window will appear:
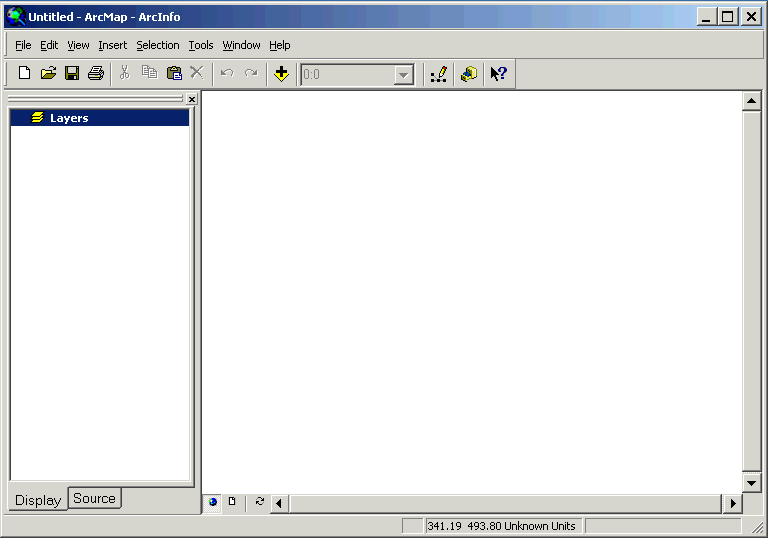
Click on the Add Data button to add the subset of the GTOPO30 data set you have created:

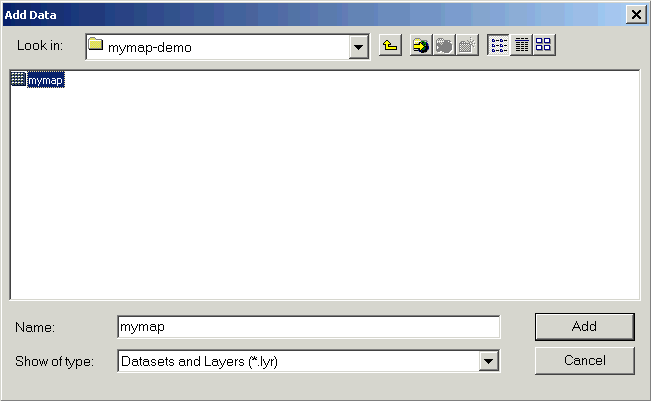
Use the Add Data dialogue to switch to F:mymap-demo, highlight mymap and click Add:
You will be asked if you want to create pyramids. I suppose you may as well say Build pyramids:
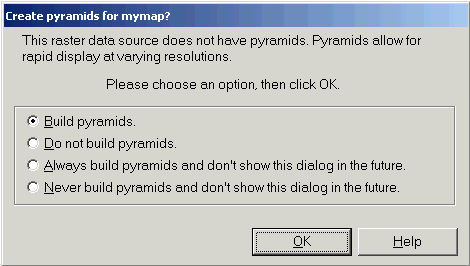
Pyramids will be built:

The subset of the GTOPO30 data set that you have created now appears in ArcMap.
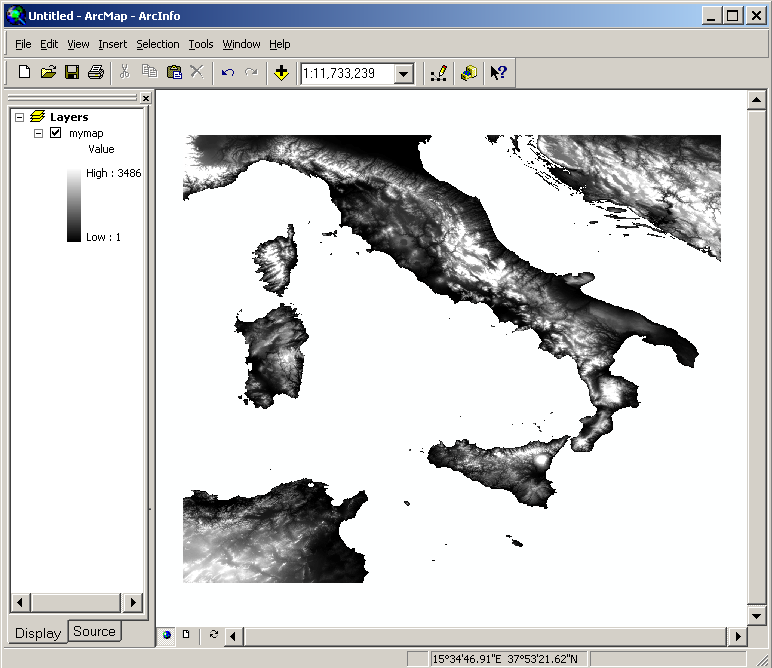
You can now use your ArcMap skills to make a map, overlay archaeological data sets, etc, etc.
You can see a finished (ish) map in this PDF file. However, note that it is very seldom appropriate to display map data in this way: You will almost certainly want to re-project the grid to a useful and relevant projection.
See here for information about how to reference/acknowledge the data set.
Here, for what it was worth, endeth the lesson.
