Computing
Using the Shuttle Radar Topography Mission (SRTM) Digital Elevation Models in ArcGIS on the PWF
Introduction
This document describes how to acquire and prepare a Digital Elevation Model (DEM) using the Shuttle Radar Topography Mission (SRTM) almost-global DEM. You can always obtain the latest version of this document from: http://www.arch.cam.ac.uk/comp/ac056/
The SRTM Digital Elevation Models were generated from a Space Shuttle using Synthetic Aperture Radar Interferometry.
- Home page of the Shuttle Radar Topography Mission (SRTM)
- Rosen et al, 2000, `Synthetic Aperture Radar Interferometry’
The SRTM resulted in a 1 arc second DEM (about 30 m resolution) but data covering areas outside the United States has been resampled to 3 arc seconds (about 90 m resolution) for our own good. This tutorial covers obtaining the the raw output from the SRTM interferometric radar processor which has various problems including areas of no data, ill-defined coastlines, and non-flat water bodies. The necessary processing is being carried out by NASA and the JPL, but as far as I can make out, they’ve only processed North and South America so far.
The unfinished SRTM DEM data is distributed in 1 degree tiles. The process of persuading ArcGIS to read them is cumbersome so I’ve created a ZIP archive of tools that will do everything apart from download the DEMs and join them together. Most of the donkey work is actually done by an Arc Macro Language (AML) script provided by the USGS.
Here’s the plan:
- Define your geographic area of interest
- Download the toolset and unpack it
- Download the necessary SRTM data
- Run the toolset against the downloaded SRTM data
- Join the converted tiles together (sorry, you have to do this by hand)
Only you know the extent of your area of interest. Make a note of the maximum x, maximum y, minimum x, and minimum y in degrees (the data is distributed in 1 degree tiles so round your minima down and your maxima up).
Use a web browser to download the toolset from:
(I’m assuming that you use the Mozilla web browser.)

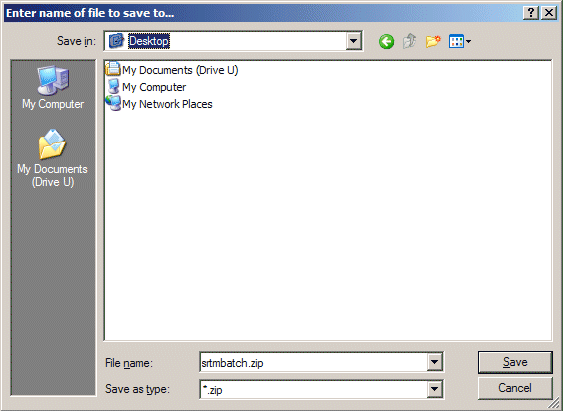
You’ll be prompted to save the ZIP archive. Put it somewhere you can find it:
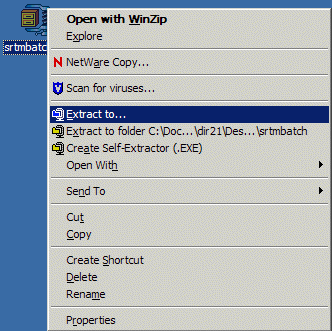
Once the download is complete, find the saved ZIP archive, right-click on it, and choose Extract to:
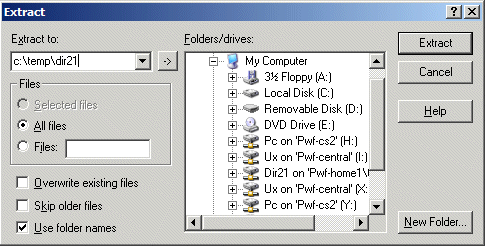
In the Extract to: field, enter c:tempfollowed by your CRSID. This will create a temporary directory to hold your working files that can be deleted after you have finished with them. This avoids cluttering up your Home Directory with useless junk that you don’t really need:
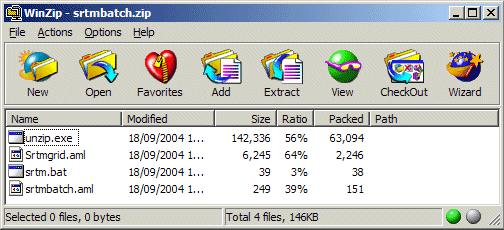
When extraction has finished, you’ll be left looking at WinZIP, like this:
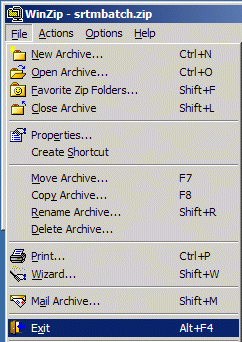
Close WinZIP by going to the File menu and choosing Exit:
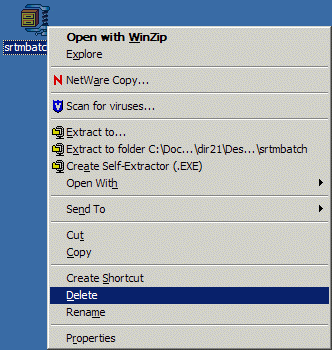
Right-click on the downloaded ZIP archive and choose Delete. You don’t need it anymore:
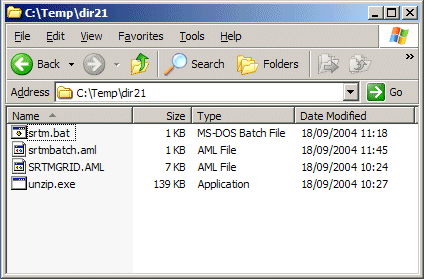
Open the temporay directory you have just created. You should see these files in it:
You need to download the SRTM DEM data itself now. Use the key map at:
to determine on what `continent’ your area of interest lies. If you haven’t already done so, start a web browser and point it at:
Click on the appropriate continent.
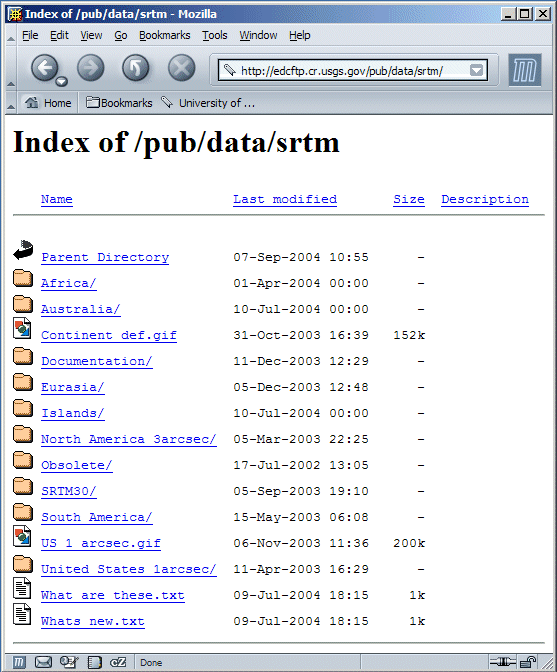
Find the relevant tiles of data (each one is named for the square it represents), and for each tile, right-click on it and choose Save Link Target As:
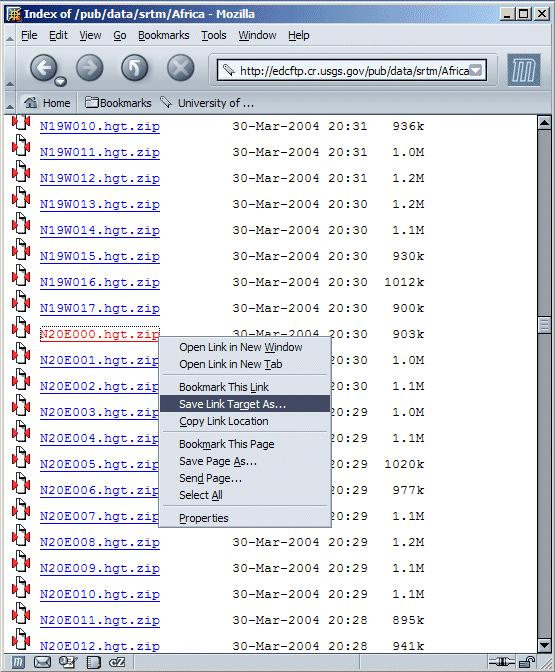
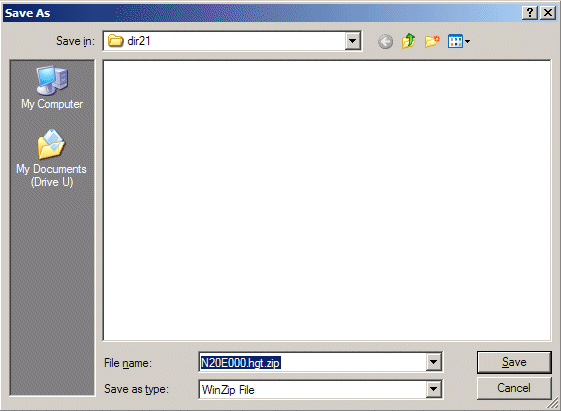
You’ll be asked where to save it. Ensure that each tile goes into the temporary directory you created earlier:
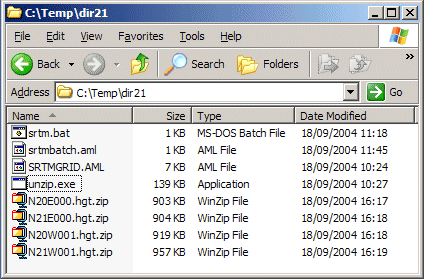
When you have finished, open the temporary directory. It should now look vaguely like this (although the names of your .hgt.zip files will probably be different. You may have more of them as well):
Start ArcGIS Workstation by clicking on the Start button:

Choosing PWF Programs:

Choosing Database Packages:

Choosing ArcGIS:

Choosing Workstation:

Choosing Arc:

After some clicking and grinding, the ARC prompt appears:
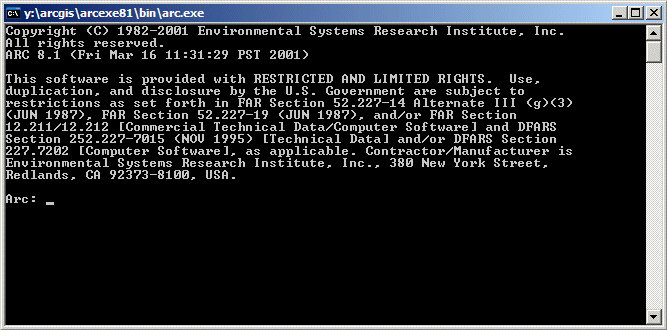
Set the ARC workspace to be the temporary directory you created earlier by saying workspace c:tempdir21 (for example) the hit return:

At the ARC prompt, start the toolset running by saying &run srtmbatch.aml

This unzips all the downloaded archives, then georeferences the tiles, then converts them to grids. This is not necessarily terribly fast. Don’t panic (too much) if nothing seems to be happening. Wait a bit.
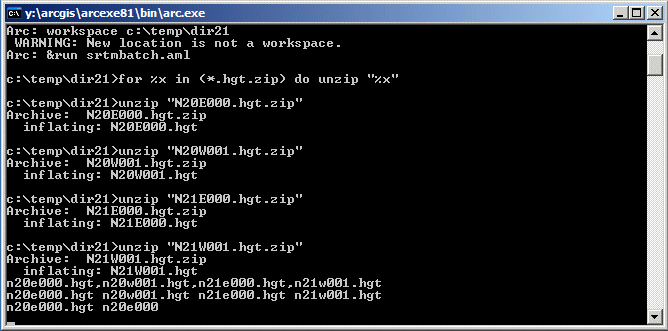
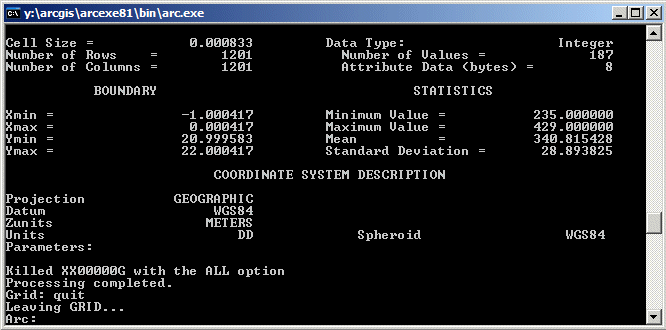
Eventually the whole thing finishes, leaving you at the GRID prompt. Say quit and press return to go back to the ARC prompt:
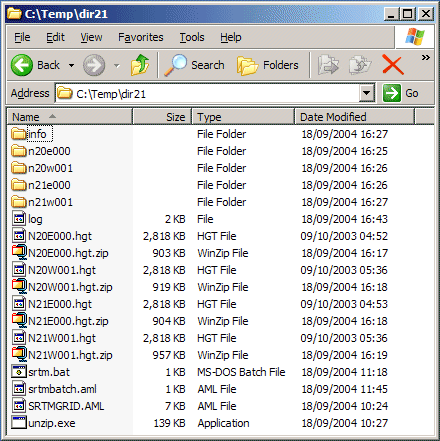
Open your temporary directory. You will see that it now contains unzipped tiles, and a number of directories named with co-ordinates. These are the grids that have been created.
Use the latticemerge command to join the grids together to create on DEM. Pick a name for the resulting complete DEM (e.g. srtmdata) and say latticemerge srtmdata

You will have to enter the name of each grid. Press return after each name, and when you have entered them all, type END and hit return. Note that latticemerge can only join 49 grids at a time so if you have more than 49 tiles you will have to do this step in stages.

When latticemerge has finished, use the describe command to check the result:
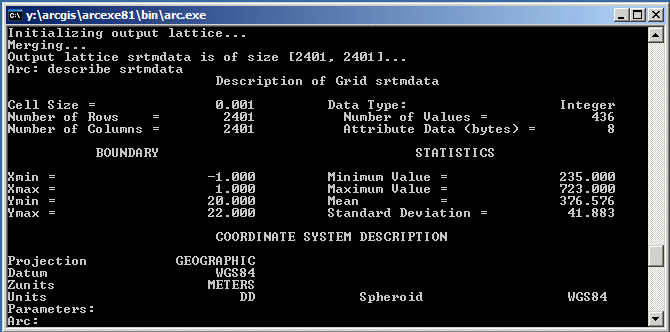
The last step is to export the complete DEM and read it into your personal filespace. Use the gridascii command top do this. gridascii takes two arguments: the name of the grid to be exported, and the name of the export file to be created. Remember that in this example, my complete DEM is called srtmdata, so I say gridascii srtmdata srtmdata.asc

When gridascii is complete, switch to a new workspace in your PWF Home Directory (i.e. on drive U:). Choose a name for the new workspace, e.g. myproject and say workspace u:myproject then hit return:

Use the asciigrid command to re-create your DEM in your Home Directory by saying asciigrid c:tempdir21srtmdata.asc srtmdata and hitting return.
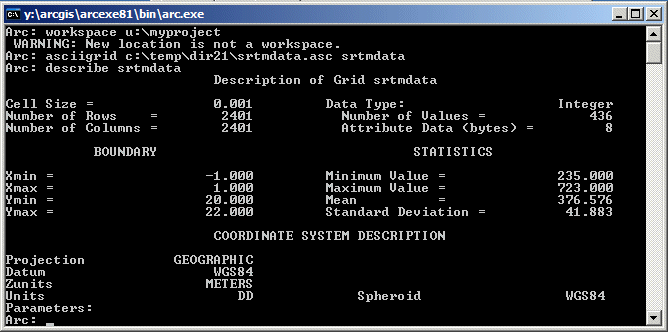
You can start ArcMap and open the grid in that to see what it looks like.
Finally, delete the temporary directory you created, (c:tempdir21) in this example.
Here, for what it was worth, endeth the lesson.
